Guida utente
Overview
MeteoHub è una piattaforma cloud che fornisce accesso ai dati meteorologici su tutto il territorio italiano, incluse previsioni meteo e marine, osservazioni, prodotti radar e dataset derivati.
Progettata per ricercatori, enti pubblici e team operativi, MeteoHub supporta sia l’esplorazione interattiva sia flussi di lavoro completamente automatizzati.
Gli utenti possono accedere e scaricare i dati tramite:
- Interfaccia Web: senza necessità di configurazioni tecniche
- REST API: per l'automazione e l'integrazione con altri sistemi.
- Client da riga di comando: per download automatizzati.
👉 L'accesso a tutti i servizi è attualmente offerto gratuitamente, nel rispetto delle policy di fair use e dei limiti di risorse.
Funzionalità principali
- Accesso unificato a molteplici dataset meteorologici.
- Dataset ottimizzati per il cloud per flussi di lavoro basati sull'intelligenza artificiale (vedi la Guida ARCO).
- Pianificazione automatizzata delle richieste.
- Post-processing integrato.
- Strumenti di visualizzazione dei dati.
A chi si rivolge MeteoHub?
- Ricercatori
- Operatori della Protezione Civile
- Aziende del settore energetico
- Agenzie ambientali
- Team di AI e data science
Dati
MeteoHub fornisce accesso a quattro categorie di dati meteorologici:
- Previsioni meteo
- Previsioni marine
- Osservazioni
- Prodotti radar
👉 Catalogo dei dataset:
https://meteohub.agenziaitaliameteo.it/app/datasets
👉 Licenze e attribuzioni:
https://meteohub.agenziaitaliameteo.it/app/license
Strumenti di Visualizzazione e Mappe
Sono disponibili diversi strumenti per visualizzare i dataset:
- Mappe previsionali: 3 giorni, Settimanali e Mensili
- Mappa statica di ICON-2I
- Mappa di previsioni marine
- Mappa dei dati osservati
- Mappa radar
La mappa previsionale a 3 giorni consente di:
- Sovrapporre fino a quattro campi contemporaneamente.
- Visualizzare, in qualsiasi punto della mappa, i valori delle variabili selezionate.
La mappa dei dati osservati consente di:
- Visualizzare le serie temporali delle variabili di una stazione.
- Scaricare i dati di una specifica variabile (esclusa la precipitazione) relativi alle stazioni comprese in un'area geografica definita dinamicamente dall'utente.
- Scaricare i dati di tutte le variabili disponibili (esclusa la precipitazione) relativi alla stazione attualmente selezionata per la visualizzazione delle serie temporali.
Partecipa a MeteoHub
Se siete un’organizzazione o un’associazione meteorologica e desiderate che i dati della vostra rete meteorologica vengano pubblicati su MeteoHub, scriveteci a meteohub-support@cineca.it. Valuteremo la vostra richiesta.
👉 Le singole stazioni non possono essere considerate.
Interfaccia Web
Per Iniziare subito
Scarica i dati in pochi semplici passaggi:
- Accedi alla piattaforma web oppure REGISTRATI gratuitamente se non hai ancora un account.
- Apri la pagina DATASET > Estrazione Dati.
- Seleziona un dataset.
- Applica i filtri (ad esempio product, time range).
- Invia la richiesta e monitora lo stato in DATASET > Le mie richieste.
- Scarica i risultati da DATASET > Le mie richieste quando sono pronti.
Download dei Dati senza Effettuare Login
Alcuni dataset sono disponibili per il download senza effettuare l'accesso.
Esistono tre modi per scaricare direttamente i dati:
- Collegamento diretto alla lista di output per variabile.
- Pacchetti di dati: includono variabili pre-selezionate (disponibili per specifici dataset di previsione e per dati radar).
- Download dei dati osservati dalle reti di monitoraggio tramite la Mappa dati osservati.
Collegamento diretto

Nella sezione DATASET > Lista open data, usa il pulsante Browse single variable files a destra, per navigare tra le cartelle per run e selezionare le variabili di interesse.
Attualmente disponibile per:
- ICON-2I (surface and pressure levels)
- ICON-2I-RUC (Rapid Update Cycle)
- MOLOCH-AIM
- Seasonal Forecast (0.1° downscaling)
- WRF
- WW3 MEDITA
Ad eccezione di WW3 MEDITA e di Seasonal Forecast, questa funzione consente l'accesso solo ai dati dell'ultima settimana.
💡 Gli utenti possono anche accedere e scaricare i dati direttamente da:
https://meteohub.agenziaitaliameteo.it/nwp/
Pacchetti di dati

Nella sezione DATASET > Lista open data, i pacchetti di dati sono insiemi di variabili di output selezionate pronti all'uso e forniti come un unico set scaricabile, disponibile per tutti gli utenti (inclusi quelli non autenticati).
Vengono generati quotidianamente e possono essere scaricati cliccando sul pulsante di download a destra. Essendo pre-elaborati, non è necessaria alcuna richiesta di estrazione.
I dataset attualmente supportati includono:
- ICON-2I (surface and pressure levels)
- BOLAM-ISAC
- MOLOCH-AIM
- MOLOCH-ISAC
- Radar SRI DPC
- WRF
- WRF_OL
- WRF_DA_ITA
Mappa dati osservati
I dati osservati possono essere scaricati direttamente da OSSERVAZIONI > Mappa dati osservati.
- Il pulsante DOWNLOAD DATA nel menù laterale consente agli utenti di scaricare i dati per la variabile selezionata (ad eccezione della precipitazione).
- Gli utenti non autenticati possono accedere ai dati degli ultimi 10 giorni e scaricare un giorno alla volta.
- Gli utenti autenticati dispongono di accesso completo e possono scaricare fino a 3 giorni consecutivi con una singola richiesta.
Dopo aver cliccato su DOWNLOAD DATA, è possibile definire:
- l’intervallo temporale desiderato,
- un’area geografica sulla mappa,
- il formato di download preferito
e procedere quindi con lo scaricamento dei dati.
Se non viene selezionata alcuna area, il dataset esportato includerà i dati di tutte le stazioni visualizzate sulla mappa.
💡 Per scaricare dati relativi a singole stazioni o a gruppi specifici di stazioni, selezionare opportunamente un’area sulla mappa.
Flusso di lavoro per l'estrazione dei dati
L’estrazione dati è un processo asincrono.
Questi sono i principali workflow:
User: Accesso → Invio di una richiesta → Monitoraggio dello stato della richiesta → Download del risultato
MeteoHub:
- Acquisizione delle richieste: Ricezione di una richiesta → Inserimento nella coda
- Elaborazione delle richieste (disaccoppiata): Recupero di una richiesta dalla coda → Elaborazione → Salvataggio del risultato
Estrazione dati guidata
Utilizza l'interfaccia web per configurare e inviare richieste di estrazione senza bisogno di impostazioni tecniche.
Ideale per:
- Analisi esplorativa
- Download occasionali
- Estrazioni programmate.
💡 In qualsiasi fase della preparazione di una richiesta di estrazione dati, gli utenti possono annullare il processo cliccando sul pulsante Cancel, che li riporta alla pagina di selezione del dataset. Una volta cliccato sul pulsante Submit, la richiesta viene inviata al sistema MeteoHub e non può più essere revocata.
Step 1 — Registrati su MeteoHub
Per utilizzare l'estrazione dati, è necessario innanzitutto un account sulla piattaforma MeteoHub:
- Vai alla pagina SIGN UP e compila il modulo di registrazione.
- Controlla la tua casella di posta e clicca sul link di verifica per attivare il tuo account.
Step 2 — Seleziona uno o più dataset
Dopo aver effettuato l'accesso a MeteoHub, vai su DATASET > Estrazione dati per avviare una richiesta e scegliere uno o più dataset dall'elenco.
È consentito selezionare più di un dataset contemporaneamente solo se i dataset:
- Appartengono alla stessa categoria
- Hanno licenze compatibili
Step 3 — Applica i filtri
I filtri dipendono dal tipo di dataset:
| Dataset | Filtri |
|---|---|
| Osservazioni | Reference time, product, level, time range |
| Previsioni | Reference time, origin, product, level, time range, area, proddef, run |
| Mare | Reference time, origin, product, level, time range, area, proddef, run |
| Radar | Reference time, origin, product, level, time range, area, proddef, run |
💡 Solo il Reference time è obbligatorio. Se gli altri filtri non vengono selezionati, non viene applicato alcun filtro.
Step 4 — Post-elaborazione opzionale
A seconda della configurazione del tuo account, è possibile applicare strumenti di post-elaborazione:
| Dataset | Post-elaborazione |
|---|---|
| Osservazioni | Derived variables, Time post-processing, Quality control filter, Format conversion |
| Previsioni | Derived variables, Time post-processing, Spatial post-processing |
| Mare | Time post-processing, Spatial post-processing |
| Radar | Time post-processing, Spatial post-processing |
💡 La post-elaborazione può ridurre lo spazio di archiviazione necessario.
Step 5 — Invia la richiesta
Prima di inviare la richiesta, devi fornire un nome per la richiesta. Può essere una singola parola o una breve frase e non é necessario che sia univoco.
💡 Utilizza un nome chiaro e descrittivo.
Prima di inviare la richiesta, puoi anche pianificarla utilizzando il pulsante Schedule.
Per maggiori dettagli, consulta la sezione Pianificare le richieste di questa guida.
Per completare la procedura, fai clic su Submit.
Step 6 — Scarica i risultati
Dopo l'invio, vieni reindirizzato a DATASET > Le mie richieste, dove puoi:
- Monitorare l'avanzamento della richiesta
- Scaricare il risultato della richiesta
Una volta pronti i risultati, ricevi una notifica via email.
Per maggiori dettagli, consulta la sezione Le mie richieste di questa guida.
💡 Nel Profilo utente, l'impostazione Notify on success request consente di attivare o disattivare le notifiche email per le richieste andate a buon fine. In caso di errore, le notifiche vengono sempre inviate.
Le mie richieste
La sezione include tre schede:
- Requests
- Schedules
- Archive
1. Scheda Requests
Questa scheda visualizza tutte le richieste inviate dall'utente.
La richiesta più recente appare in cima, con lo stato PENDING se l'esecuzione è ancora in corso.
Facendo clic sull'icona di aggiornamento, le informazioni della pagina vengono aggiornate:

Quando lo stato della richiesta diventa SUCCESS, l'esecuzione è stata completata con successo e i dati di output sono disponibili per il download tramite l'icona di download corrispondente:
Facendo clic sull'icona del cestino rosso:

gli utenti possono scegliere una delle seguenti opzioni:
- Archive: la richiesta viene spostata nella scheda Archive, mentre tutti i file correlati vengono eliminati definitivamente.
- Delete: sia la richiesta che tutti i file associati verranno eliminati definitivamente.
Le richieste in stato PENDING non possono essere eliminate fino al completamento dell’esecuzione.
Inoltre, le richieste non vengono conservate a tempo indeterminato a meno che non vengano archiviate. Esse scadono automaticamente dopo un massimo di 180 giorni. Quando una richiesta scade, il sistema la archivia o la elimina in base alla configurazione impostata tramite l'opzione Delete expired requests nella sezione Profile (accessibile dal menu in alto a destra).
Gli utenti possono anche configurare un periodo di scadenza più breve utilizzando il campo Requests expiration nel Profile.
💡 Questa funzionalità aiuta a gestire automaticamente le richieste e la conservazione dei dati, riducendo l'utilizzo dello spazio di storage poiché la quota di archiviazione per utente è limitata
Ulteriori informazioni sono disponibili nella scheda Requests
- L'utilizzo della quota di archiviazione da parte dell'utente viene visualizzato nella sezione Storage a sinistra.
- Il numero di richieste inviate durante l'ultima ora è visualizzato nella sezione Request Hourly Report a sinistra.
💡 Per rispettare i limiti di storage, le richieste che si prevede generino risultati di grandi dimensioni devono essere suddivise in richieste più piccole (vedere la sezione Buone pratiche di questa guida)
Dettagli della richiesta
Facendo clic sull'icona di espansione accanto al nome della richiesta:

gli utenti possono visualizzare ulteriori dettagli:
- Task ID
- Dataset
- Reference time
- Filter
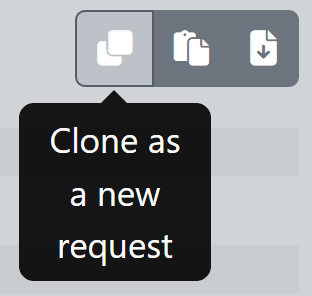
Nell'angolo in alto a destra sono disponibili tre icone:
- Clone as a new request: crea una nuova richiesta basata su quella selezionata. Gli utenti possono modificarne i parametri e inviarla nuovamente
- Copy to clipboard: copia i parametri della richiesta in formato JSON.
- Download JSON: scarica i parametri della richiesta in un file JSON.

💡 Il JSON generato può essere riutilizzato per inviare la stessa richiesta tramite l'API.
2. Scheda Schedules
La scheda Schedules visualizza tutte le richieste pianificate dall'utente.
Le richieste programmate possono essere:
- impostate su OFF per disattivarle temporaneamente
- impostate su ON per riattivarle
- eliminate definitivamente.
L'eliminazione di una richiesta programmata non rimuove automaticamente le richieste correlate dalla scheda Requests.
Espandendo la riga di una richiesta pianificata, gli utenti possono visualizzare:
- Dettagli della richiesta
- Metodo di pianificazione
- Data e dimensione dell'ultima esecuzione
È inoltre possibile scaricare il file di output dell'esecuzione più recente.
3. Scheda Archive
La scheda Archive visualizza le richieste archiviate. Le richieste archiviate possono anche essere eliminate definitivamente. Espandendo una richiesta archiviata, gli utenti possono visualizzare le informazioni standard relative alla richiesta.
Le seguenti funzioni sono disponibili anche per le richieste archiviate:
- Clone as a new request
- Copy to clipboard
- Download JSON
Pianificare le richieste
La pianificazione consente agli utenti di eseguire automaticamente le richieste per recuperare i nuovi dati aggiunti a un dataset dall'ultima esecuzione.
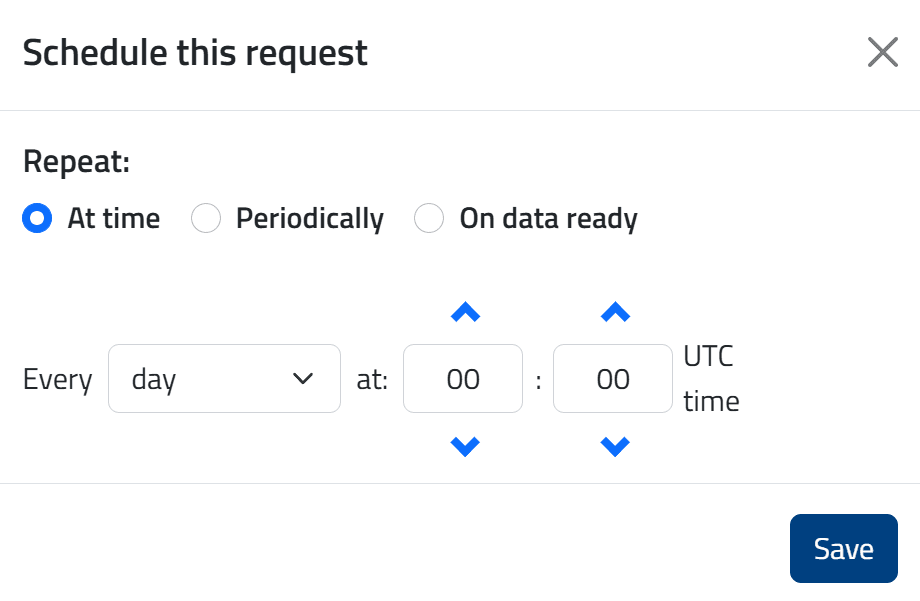
Esistono tre metodi di pianificazione:
- At time: esecuzione a orario fisso (ad esempio ogni giorno alle 09:00)
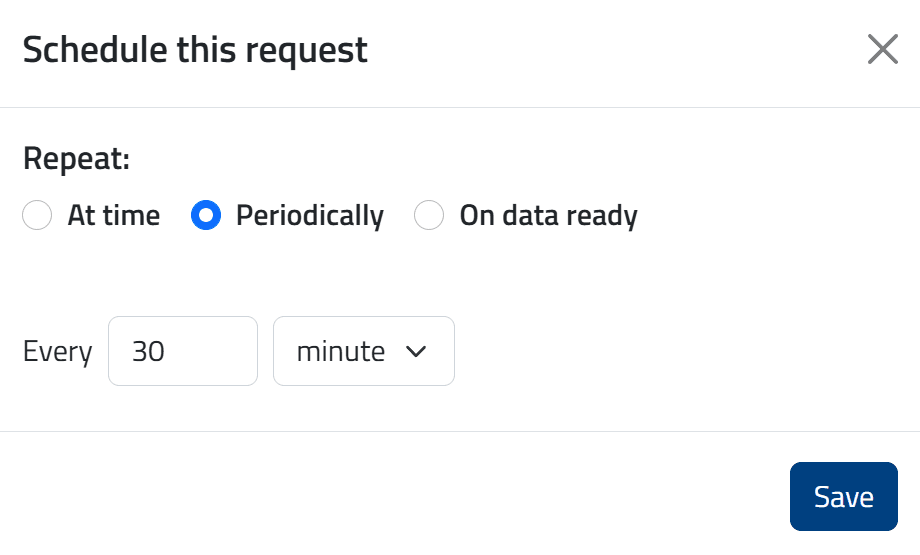
- Periodically: esecuzione ripetuta a intervalli regolari (ad esempio ogni 4 ore)
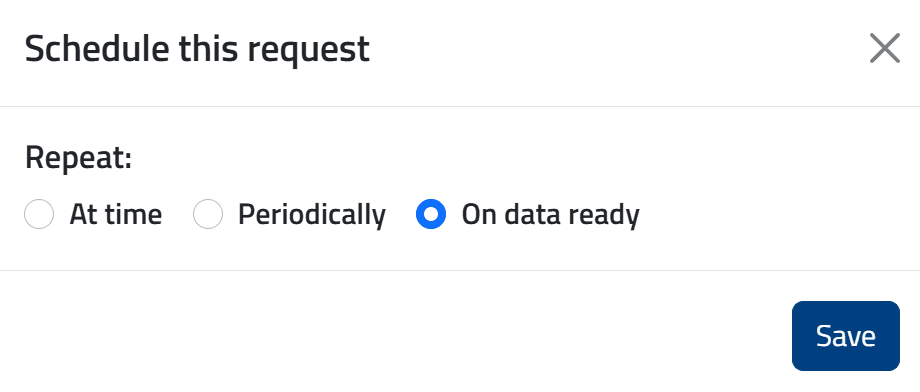
- On-data-ready: esecuzione automatica non appena sono disponibili nuovi dati.
👉 Per l’opzione Periodically, l'intervallo di programmazione non può essere inferiore a 15 minuti.
Dopo la pianificazione, la richiesta appare nella scheda Schedules e viene attivata automaticamente al verificarsi della condizione configurata.
Alla prima creazione di una richiesta on-data-ready pianificata, questa viene anche eseguita immediatamente e poi rieseguita ogni volta che arrivano nuovi dati. Al contrario, quando una richiesta on-data-ready precedentemente disattivata viene riattivata, riprende l’esecuzione non appena nuovi dati diventano disponibili; eventuali dati ricevuti durante il periodo di disattivazione non vengono recuperati.
Se viene superata la quota di storage, le richieste pianificate vengono automaticamente disattivate. Esse non vengono riattivate automaticamente quando lo spazio torna disponibile e devono essere riattivate manualmente nella scheda Schedules.
Le richieste pianificate possono essere disattivate o eliminate definitivamente.
💡 Il metodo on-data-ready è particolarmente adatto per i dataset previsionali, in quanto attiva automaticamente la richiesta ogni volta che sono disponibili nuovi dati.
💡 Il metodo periodico è utile per recuperare dati osservati in tempo quasi reale, programmando le estrazioni a intervalli regolari (ad esempio ogni 30 minuti).
Dati osservati
I dataset osservativi sono dinamici e possono essere aggiornati nel tempo, poiché correzioni o dati aggiuntivi potrebbero diventare disponibili anche giorni dopo la pubblicazione originale.
Di conseguenza, le estrazioni programmate non garantiscono una replica esatta del dataset nel tempo.
Impostazioni del profilo utente
Facendo clic sull'icona Profile nell'angolo in alto a destra dell'intestazione, gli utenti possono visualizzare e gestire le impostazioni del proprio profilo.
👤 Informazioni Utente
- Full name: nome e cognome dell’utente.
- Email: indirizzo email dell’utente (usato anche come username).
(Configurato dagli amministratori o dal sistema)
- Group attualmente non in uso.
- Roles: classificazione dei ruoli dell’utente.
- Privacy accepted: indica se l’utente ha accettato l'informativa sulla privacy della piattaforma.
💾 Archiviazione e gestione dei dati
(Configurato dagli amministratori o dal sistema)
- Disk quota (GB): spazio di archiviazione assegnato all'utente per il salvataggio dei risultati delle richieste.
(Modificabile anche dall'utente)
- Requests expiration (max 180 days): numero di giorni dopo i quali le richieste scadono.
- Delete expired requests (Yes/No):
- Yes: le richieste scadute vengono eliminate.
- No (impostazione predefinita): le richieste scadute vengono archiviate.
📊 Autorizzazioni di Accesso ai Dati
(Configurato dagli amministratori o dal sistema)
- Open datasets allowed (Yes/No): consente l'accesso ai dataset aperti.
- Allowed datasets: definisce l'accesso a dataset specifici (attualmente non in uso).
- Observation archive allowed (Yes/No): consente l'accesso allo storico dei dati osservati.
⚙️ Elaborazione e Pianificazione
(Configurato dagli amministratori o dal sistema)
- Post-processing allowed (Yes/No): consente l'utilizzo di strumenti di post-elaborazione.
- Schedules allowed (Yes/No): consente la pianificazione delle richieste di estrazione dati.
(Modificabile anche dall'utente)
- Notify on success request: abilita o disabilita le notifiche email quando una richiesta viene completata con successo.
💡 In caso di fallimento della richiesta, le notifiche via email vengono sempre inviate indipendentemente da questa impostazione.
📦 Limiti e Vincoli
(Configurato dagli amministratori o dal sistema)
- Max number of templates: numero massimo di modelli (ad es. shapefile o GRIB) che possono essere caricati per l'elaborazione successiva. Impostare a 0 per caricamenti illimitati.
- Max allowed output size (GB): dimensione massima di output per una singola richiesta di estrazione.
- Allowed requests per hour: numero mas o dal sistemasimo di richieste che possono essere inviate all'ora. Impostare a 0 per nessun limite.
🔐 Sicurezza e Accesso
- Last password change: data dell'ultimo aggiornamento della password. Fare clic su Change per aggiornare la password.
- Open sessions: sessioni utente attualmente attive.
🔑 Integrazione
- ARCO Access Key: consente agli utenti di creare, sostituire o eliminare la chiave di accesso per il servizio ARCO.
👉 Vedi la ARCO Guide per maggiori dettagli.
🧹 Obsoleto/Non utilizzato
- AMQP Queue: attualmente non in uso.
Modifica del Profilo
Facendo click sull'icona:

gli utenti possono personalizzare i seguenti parametri:
- First name
- Last name
- Requests expiration in days (max 180)
- Delete expired requests (otherwise requests are archived)
- Notify on successful request
Client da riga di comando (CLI)
Il client MeteoHub è un'applicazione da riga di comando progettata per utenti esperti che necessitano di funzionalità di automazione.
È destinato principalmente a:
- estrazioni pianificate
- recupero dei pacchetti di dati.
Il client non supporta la creazione di richieste o pianificazioni: le richieste di estrazione e le pianificazioni devono essere create tramite l'interfaccia web o l'API.
L'applicazione client può essere scaricata dal repository GitLab, che include anche la relativa documentazione.
💡 Utilizza l'API per flussi di lavoro end-to-end completamente automatizzati.
API
L'API MeteoHub consente l'automazione completa dei flussi di lavoro, tra cui:
- creazione della richiesta
- pianificazione delle richieste
- download dei risultati
👉 La documentazione Swagger è disponibile qui.
Ottieni l'Access Token
Per utilizzare le API autenticate è necessario fornire un token di accesso.
Il token si ottiene tramite l'API di login:
https://meteohub.agenziaitaliameteo.it/auth/login
Esempio di richiesta:
POST https://meteohub.agenziaitaliameteo.it/auth/login
{
  "username": "user@example.com",
  "password": "string",
}
👉 Il token di accesso deve essere incluso nell'Authorization header.
Esempio di richiesta API autenticata tramite cURL:
curl -X 'GET' 'https://meteohub.agenziaitaliameteo.it/api/requests' -H 'Authorization: Bearer <access token>'
Invia una richiesta di estrazione dati
Per creare una richiesta di estrazione dati, utilizzare la seguente API:
POST https://meteohub.agenziaitaliameteo.it/api/data
Questo endpoint richiede l'autenticazione. Il token di accesso ottenuto dall'API di login deve essere incluso nell'Authorization header.
Il corpo della richiesta deve includere:
- Request name
- Dataset(s)
- Reference time in UTC
- Filters (optional)
- Post-processing (optional)
Esempio del corpo della richiesta:
{
  "request_name": "name of the request",
  "reftime": {
    "from": "2022-01-10T11:04:54.615Z",
    "to": "2022-01-10T11:04:54.615Z"
  },
  "dataset_names": [
    "dataset_name"
  ],
  "filters": {
    "area": [{}],
    "level": [{}],
    "origin": [{}],
    "proddef": [{}],
    "product": [{}],
    "quantity": [{}],
    "run": [{}],
    "task": [{}],
    "timerange": [{}],
    "network": [{}]
  },
  "output_format": "json",
  "only_reliable": true,
  "postprocessors": [
    {}
  ]
}
💡 I filtri sono specifici per ogni dataset (vedi la tabella correlata in questa guida).
I dataset osservativi supportano anche:
- output_format (facoltativo): restituisce i dati in formato JSON anziché nel formato BUFR predefinito.
- only_reliable (facoltativo): esclude i dati contrassegnati come inaffidabili.
💡 Per semplificare la creazione delle richieste, soprattutto quando sono necessari filtri specifici, si consiglia di generare prima la richiesta tramite l'Interfaccia Web. Successivamente, dalla pagina DATASET > Le mie richieste, utilizzare l'opzione Copy to clipboard per copiare il JSON da utilizzare come body nell'API.

Pianifica una richiesta [optionale]
Per creare una richiesta di estrazione dati programmata, utilizzare la seguente API:
POST https://meteohub.agenziaitaliameteo.it/api/schedules
Questo endpoint richiede l'autenticazione. Il token di accesso ottenuto dall'API di login deve essere incluso nell’Authorization header della richiesta.
Il corpo della richiesta è simile a quello descritto nella sezione precedente Submit a Data Extraction Request, con parametri aggiuntivi per definire l'intervallo di pianificazione.
I metodi di pianificazione disponibili sono:
- Estrazione periodica: i dati vengono estratti a intervalli di tempo regolari (ad esempio, ogni 4 ore).
Per abilitare questo metodo, aggiungi il seguente parametro al corpo della richiesta:
"period-settings": {
  "every": number,    // time interval of the extraction
  "period": string    // one of: “minutes","hours","days"
}
👉 È possibile specificare qualsiasi intervallo di estrazione, con un valore non inferiore ai 15 minuti.
- Esecuzione a tempo fisso: i dati vengono estratti in giorni specifici e a orari specifici (ad esempio, ogni lunedì alle 09:00).
Per abilitare questo metodo, aggiungi il seguente parametro al corpo della richiesta:
"crontab-settings": {
  "minute": number #range between 0-59,
  "hour": number   #range between 0-23,
  "day_of_week": number    // range between 0-7 where 0 and 7 refers
                           // to Sunday, 1 to Monday, and so on
  "day_of_month": number    // range between 0-31
  "month_of_year": number   // range between 1-12 where 1 refers to
                            // January and 12 refers to December
}
👉 Se non vengono forniti valori per day_of_week, day_of_month o month_of_year, la richiesta utilizza come impostazione predefinita una pianificazione giornaliera (ogni giorno dell'anno).
- On-data-ready: i dati vengono estratti non appena diventano disponibili.
Per abilitare questo metodo, aggiungi il seguente parametro al corpo della richiesta:
"on-data-ready": true
👉 Questa opzione è supportata solo per i dataset previsionali.
Scarica il risultato di una richiesta di estrazione dati
- Recupera l'elenco di tutte le richieste inviate e il loro stato:
GET https://meteohub.agenziaitaliameteo.it/api/requests
Se l'estrazione dei dati è completa, il parametro fileoutput nella risposta indica il nome del file di output.
- Scarica il file utilizzando l'endpoint dedicato:
GET https://meteohub.agenziaitaliameteo.it/api/data/{filename}
dove il parametro filename specifica il file da scaricare.
Questi endpoint richiedono l'autenticazione. Il token di accesso ottenuto dall'API di login deve essere incluso nell'intestazione Authorization delle richieste.
Elimina le richieste
- Utilizza questo endpoint per recuperare tutte le richieste inviate e identificare l'ID della richiesta di interesse:
GET https://meteohub.agenziaitaliameteo.it/api/requests
Se l'estrazione dei dati è completa, il parametro fileoutput nella risposta indica il nome del file di output
- Elimina la richiesta utilizzando l'endpoint dedicato:
DELETE https://meteohub.agenziaitaliameteo.it/api/requests/{request_id}
dove il parametro filename specifica il file da scaricare.
Questi endpoint richiedono l'autenticazione. Il token di accesso ottenuto dall'API di login deve essere incluso nell'intestazione Authorization delle richieste.
💡L'ID della richiesta viene restituito anche nella risposta dell'endpoint di estrazione dati come campo request_id
Scarica i pacchetti di dati
👉 Non è richiesta alcuna autenticazione per utilizzare queste API, a meno che il dataset non abbia accesso limitato.
Scarica i pacchetti con filtri
Utilizza questo endpoint per scaricare uno o più pacchetti di dati filtrati per dataset, data di riferimento e/o run:
GET https://meteohub.agenziaitaliameteo.it/api/opendata/{dataset_id}/download?reftime={reference_date}&run={run}
- dataset_id: corrisponde al Dataset ID visualizzato nella pagina Lista open data page.
- reference_date: i formati supportati sono YYYYMMDD oppure YYYY-MM-DD (ad esempio, per scaricare i pacchetti del 10 gennaio 2022 utilizzare 20220110 oppure 2022-01-10).
- run: run del modello HH:MM (ad esempio, 12:00), espresso in UTC.
Scarica un pacchetto dati specifico
Recupera l'elenco dei pacchetti di dati disponibili per uno specifico set di dati:
GET https://meteohub.agenziaitaliameteo.it/api/datasets/{dataset_id}/opendata
- dataset_id: corrisponde al Dataset ID visualizzato nella pagina Lista open data.
Il campo filename nella risposta indica il nome di ciascun pacchetto di dati.
👉 Questa funzionalità è attualmente disponibile solo per un sottoinsieme di dataset previsionali e per il dataset radar_sri_dpc (vedere i dataset abilitati nella sezione Pacchetti di dati in questa guida
Scarica uno specifico pacchetto di dati:
GET https://meteohub.agenziaitaliameteo.it/api/opendata/{filename}
Il campo filename indica il nome del pacchetto di dati di interesse.
Buone pratiche
🔹 Utilizzare l’API per pipeline automatizzate.
🔹 Preferire le estrazioni pianificate per flussi di lavoro ricorrenti.
🔹 Applicare filtri per ottimizzare lo spazio di archiviazione.
🔹 Per rispettare le quote storage, suddividere le richieste che si prevede generino output di grandi dimensioni in richieste più piccole.
🔹 Utilizza le opzioni di configurazione nella sezione Profile (icona nell'angolo in alto a destra dell'intestazione) per gestire automaticamente la conservazione delle richieste e dei dati correlati, contribuendo a liberare spazio di archiviazione poiché la quota di storage dell'utente è limitata.
Gestione dei dati
🔹 Eliminazione di una richiesta: nella pagina DATASET > Le mie richieste, cliccando sull’icona del cestino rosso, l’utente può scegliere se eliminare o archiviare la richiesta. Nel caso dell’archiviazione, vengono eliminati solo i dati; nel caso dell’eliminazione, sia la richiesta sia tutti i file associati vengono eliminati in modo permanente.
🔹 Scadenza delle richieste: le richieste non vengono conservate indefinitamente e scadono dopo un periodo di conservazione definito dall’utente nel Profile. Il valore predefinito e massimo è 180 giorni.
🔹 Conservazione delle richieste scadute: gli utenti possono scegliere nel proprio Profile come gestire le richieste scadute, eliminandole oppure archiviandole. L’impostazione predefinita è di archiviare.
🔹 Archiviazione delle richieste: la richiesta viene archiviata e tutti i file associati vengono eliminati in modo permanente. Le richieste archiviate sono elencate nella scheda Archive della pagina DATASET > Le mie richieste. Gli utenti possono rieseguire una richiesta archiviata utilizzando il pulsante Clone presente sulla destra nei dettagli della richiesta.
Limiti di utilizzo
(Solo gli amministratori possono modificare questi valori)
🔹 Limiti di quota disco: lo spazio di archiviazione allocato all'utente per il salvataggio dei risultati delle richieste è limitato. Il valore predefinito è 1,0 GB.
🔹 Dimensione massima di output consentita (GB): la dimensione massima dei risultati di ogni richiesta di estrazione dati è limitata. Il valore predefinito è 1,0 GB.
🔹 Richieste consentite in un’ora di tempo: il numero massimo di richieste che possono essere inviate in un’ora di tempo è limitato. Il valore predefinito è 10.
🔹 Numero massimo di modelli: il numero massimo di modelli (ad esempio, shapefile o GRIB) che possono essere caricati è limitato. Il valore predefinito è 1.
Suggerimenti
🔹 Utilizzare il JSON precompilato nei dettagli della richiesta (pagina DATASET > Le mie richieste) per inviare la stessa richiesta tramite API.
🔹 Nella funzionalità DATASET > Estrazione dati, se non vengono selezionati filtri, verranno restituiti tutti i dati disponibili nel dataset per il periodo di riferimento specificato. Il periodo di riferimento è l’unico parametro obbligatorio.
🔹 Utilizzando la funzionalità DATASET > Estrazione dati, i dati osservati possono attualmente essere recuperati solo a livello di rete; il filtraggio per singole stazioni o gruppi personalizzati di stazioni non è supportato.
Per ottenere dati relativi a specifiche stazioni, il workflow consigliato è il seguente:
- Inviare una richiesta di estrazione utilizzando i filtri desiderati (ad esempio variabili, reti e intervallo temporale).
- Effettuare il post-processing del file di output in formato JSON Lines tramite uno script personalizzato per mantenere solo le stazioni di interesse.
In alternativa, i dati osservati possono essere scaricati direttamente da OSSERVATI > Mappa dati osservati, selezionando l’area desiderata sulla mappa tramite la funzione DOWNLOAD DATA. Tuttavia, in questo caso non sono disponibili funzionalità avanzate come il post-processing e la schedulazione delle richieste.
🔹 Nel Profilo utente, l’impostazione Notify on success request consente agli utenti di attivare o disattivare le notifiche email quando una richiesta viene completata con successo. In caso di fallimento della richiesta, l’email di notifica viene sempre inviata indipendentemente da questa impostazione.
Pianificazione delle richieste
🔹 Il metodo on-data-ready è adatto ai dataset di previsione, poiché attiva automaticamente la richiesta quando nuovi dati previsionali diventano disponibili.
🔹 Il metodo periodico può essere utilizzato per recuperare dati osservati quasi in tempo reale programmando estrazioni a intervalli regolari (ad esempio, ogni 30 minuti).
🔹 I dataset osservativi sono dinamici e possono essere aggiornati nel tempo, poiché correzioni o dati aggiuntivi possono essere ricevuti anche giorni dopo la pubblicazione iniziale. Di conseguenza, estrazioni pianificate non garantiscono una replica esatta del dataset nel tempo.
⚠️ Se viene superata la quota di storage, le richieste pianificate vengono automaticamente disattivate. Esse non vengono riattivate automaticamente quando lo spazio torna disponibile e devono essere riattivate manualmente nella scheda Schedules.
⚠️ Alla prima creazione di una richiesta on-data-ready pianificata, questa viene anche eseguita immediatamente e poi rieseguita ogni volta che arrivano nuovi dati. Al contrario, quando una richiesta on-data-ready precedentemente disattivata viene riattivata, riprende l’esecuzione non appena nuovi dati diventano disponibili; eventuali dati ricevuti durante il periodo di disattivazione non vengono recuperati.
Gestione degli errori
🔹 La richiesta richiede troppo tempo?
Applicare filtri o suddividerla in richieste più piccole. Il ritardo potrebbe anche essere dovuto a un sovraccarico temporaneo del sistema.
🔹 Dataset non disponibile?
Verificare permessi dell’account, licenze o sintassi della richiesta API.
🔹 Richiesta in stato Pending troppo a lungo?
- Si prega di attendere: potrebbe essere dovuto a un sovraccarico temporaneo del sistema.
- Se la richiesta rimane Pending per più di un giorno, contattare il supporto.
- In ogni caso, dopo 2 giorni le richieste Pending vengono automaticamente marcate come Failed e possono quindi essere eliminate dall'utente.
🔹 Errori di autenticazione?
Assicurarsi che il token API sia valido e non scaduto
🔹 Richiesta fallita per risultato vuoto?
Possibili cause includono:
- Combinazione non corretta dei filtri nella richiesta.
- Il Reference Time richiesto (reftime) non è disponibile
🔹 Cause comuni di fallimento della richiesta
- La dimensione del risultato eccede i limiti permessi.
- È stata superata la quota di storage di archiviazione.
FAQ
🔹 Come posso monitorare lo stato delle mie richieste?
Nell’Interfaccia Web lo stato è visibile in DATASET > Le mie richieste.
Tramite API è possibile recuperare tutte le richieste e il loro stato attuale usando
GET https://meteohub.agenziaitaliameteo.it/api/requests
Questa API richiede l'autenticazione. Vedere la sezione Ottieni l’access token in questa guida
🔹 Come posso controllare l'attuale occupazione della mia quota di storage?
Nell'Interfaccia Web, l'attuale occupazione della quota di storage is visualizzata nella pagina DATASET > Le mie richieste nell'indicatore Storage a sinistra.
Tramite l'API, l'occupazione dello storage può essere ricavata usando:
GET https://meteohub.agenziaitaliameteo.it/api/usage
Questa API richiede l'autenticazione. Vedere la sezione Ottieni l’access token in questa guida.
💡 Per le API, i valori di utilizzo sono espressi in byte.
🔹 Come posso vedere quante richieste ho effettuato nell’ultima ora e quante ne posso ancora effettuare?
Nell’Interfaccia Web, questa informazione è disponibile in DATASET > Le mie richieste nella sezione Request Hourly Report sulla sinistra.
Tramite API è possibile ottenere le stesse informazioni usando:
GET https://meteohub.agenziaitaliameteo.it/api/hourly
Questa API richiede l'autenticazione. Vedere la sezione Ottieni l’access token in questa guida.
Supporto
Per assistenza o richieste di informazioni tecniche, contattare:
© 2019-2026 |
Powered by